ISPs are now serious about authentication, from SPF to DKIM, and not authenticating your email is causing issues with your mail delivery. Not authenticating can lead to not delivering your message to a user.
Taking steps to ensure that email can and is authenticated is one of the prerequisites to ensuring email delivery. Publishing your SPF and Sender ID records is relatively easy and can be accomplished in a number of minutes if you have all the right information.
What you need for SPF and Sender ID;
- An accurate list of your outbound IP address (the network location where your mail originates) or the network range (a number of IP addresses).
– Your ESP or technical support team should be able to provide this to you. - Recommend tools are available at OpenSPF and Microsoft to help build the proper records for for SPF and Sender ID records.
- After determining your records you will need to publish these in your DNS records for your domain(s)
- Your DNS records should look like this:
mail.example.com IN TXT “v=spf1 MX A ip4:1.2.3.4 -all”
mail.example.com IN TXT “spf2.0/pra a mx ip4:1.2.3.4 -all” - After publishing these records you should start to see your messages authenticated on delivery.
- To test this setup, send a message from user@mail.example.com to a gmail address.
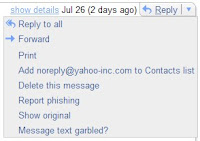
- Open the message and select “Show original” from the drop down menu on the right side of the message, This will give you a text version of your message.
- Look through the header (top of page) and find the list looking like this:
– Received-SPF: pass (google.com: domain of user@email.example.net designates 1.2.3.4 as permitted sender)
Other test sites are available to use – try this one from ‘Return Path‘


