

Monitoring your email reputation is a key to understanding how your email program is operating and how Mailbox providers, like Google, view the IP address and domains your brand is using. If you’ve never setup the Google Postmaster tools here is a quick “How to…” to help get you started. You’ll need a Google account and access to your DNS in order to verify your domains.
These tools are provided free of charge by Google and allow domain owners to review their email reputation with Google. You’ll need to follow these instructions for each domain you want to add into the tools. If the domain is already verified in the GPT platform you can skip ahead to the next set of instructions.
Note: Subdomains can also be added without additional “verification” once the organizational domain is properly verified.
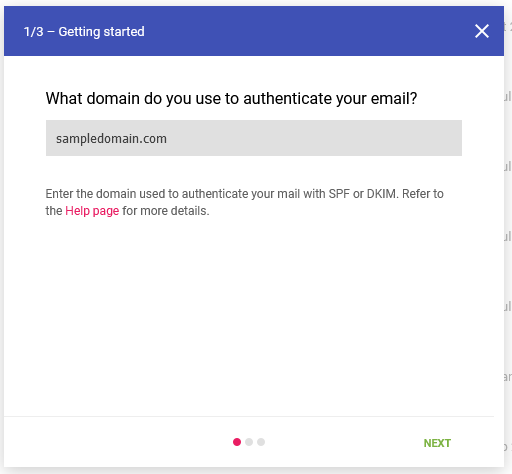
To setup Google Postmaster Tools (GPT) and sign in with your Google/Gmail account.
Add a new domain:
- Add domain using the plus (+) sign in the bottom right hand corner of the screen.
- Enter the domain name
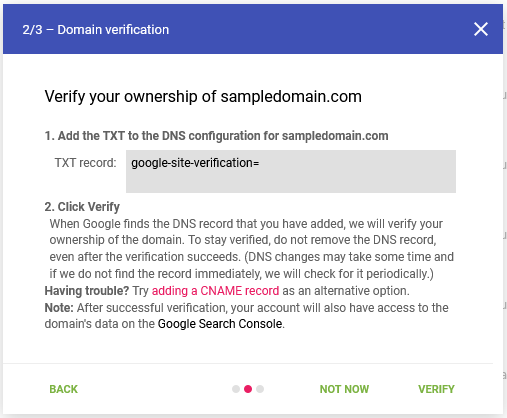
- Add the required DNS records for your domain – there will be a text record provided, or alternatively a CNAME
- Click verify the domain after the DNS is setup
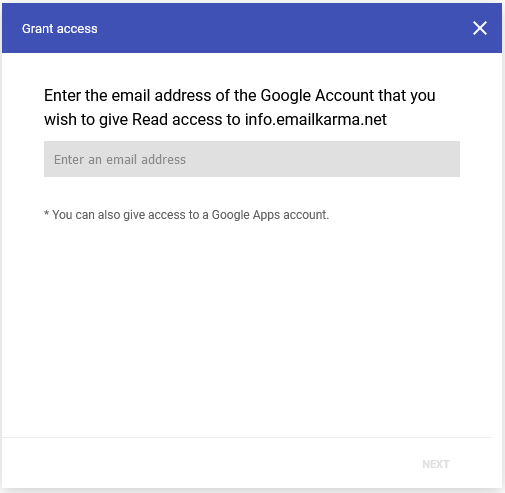
Add an additional read only user. Some ESPs or deliver monitoring services ask for this in order to offer services that import your Google Postmaster data directly into their platforms.
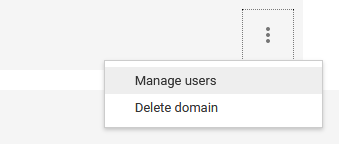
- For each domain click the three vertical dots to the right hard side of the domain
- Select “Manage users”
- Click the plus (+) to add a user in the bottom right corner
- Enter the email address you plan to give access to
- Click ‘Next’ to provide read only access
To withdraw consent in the future select the domain, similar to how you added an address in part 2, and select the three vertical dots next to the user name and select ‘Delete user’
